Adding a mSATA port to the motherboard of a Lenovo ThinkCenter M73 to enable me to add High Availability to my homelab.
The Lenovo M73p is part of the ThinkCenter line of business-oriented desktop computers designed, developed by Lenovo. ThinkCentre computers typically include mid-range to high-end processors, options for discrete graphics cards, and multi-monitor support.
Generally, business-oriented desktop computers have different sizes for each model. I'm particularly interested in the tiny ones. They have been made popular by the Tiny/Mini/Micro project published on ServeTheHome.
To summarize, the idea is that there are plenty of technologies where one would want several physical nodes. In my case, the end goal is a HA setup for Proxmox VE.
Aside from the fact that having multiple nodes is obviously better for HA, theses small servers usually don't use a lot of energy, which today is a pretty good thing 💰. My four M73p consume somewhere between 60-85 WH depending on the load. Way better than one server powerful which might not be enought for everything that will consume +150 WH and won't have any HA 😕.
They also can be found for very cheap, I bought my nodes for somewhere between €60 and €90 each.
Of course, they have some downside:
That being said, they are very capable machines, way more than I need for my homelab, especially if I have 4 of them.
In my homelab I'm planning to experiment with Ceph, or maybe GlusterFS which means data will be on the nodes themselves.
High Availability, however, requires at least two things that this computer lacks:
In this article, I'll fix the two disk issue.
There are multiple options that I considered, I wanted to leave the internal SATA port for a SSD for the data of Ceph cluster. That didn't leave many options for the OS:
I canned the USB Key solution pretty quickly, unlike OSes like Unraid where there is barely anything written to disk, Proxmox writes quite a lot which would destroy the key very fast.
I also wanted to avoid using the USB3 port because I planned to use these (or at least one of these) for the Ceph network and didn't want to have to share the bandwidth.
The last solution was the USB 2.0 SSD bodged to an internal header, which would work, and I would have probably done it if I didn't notice the mSATA port 🤔.
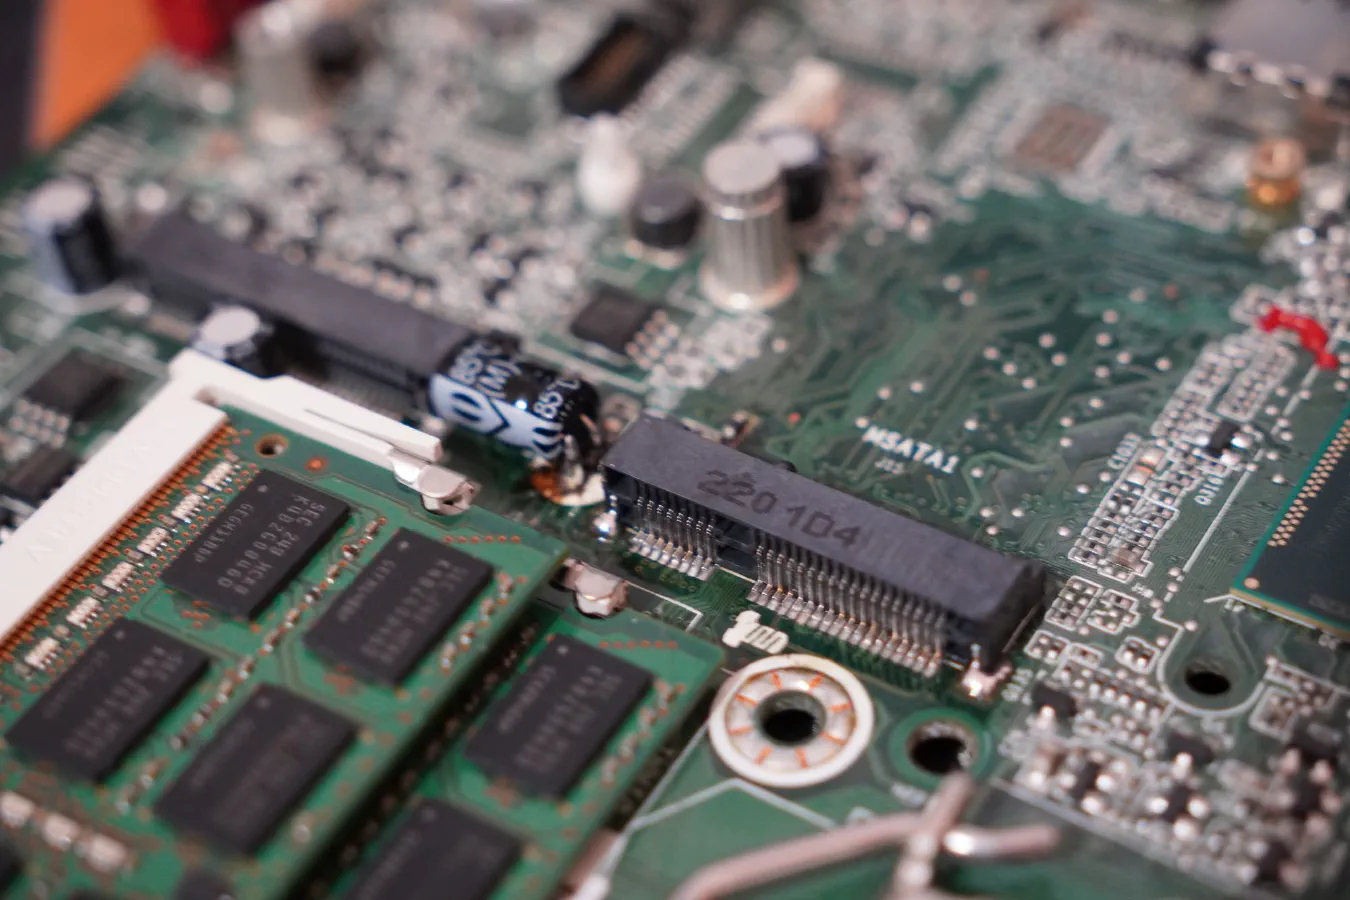
When you look at the M73 motherboard, you can see an obviously missing footprint marked MSATA1 right next to the Wi-Fi slot: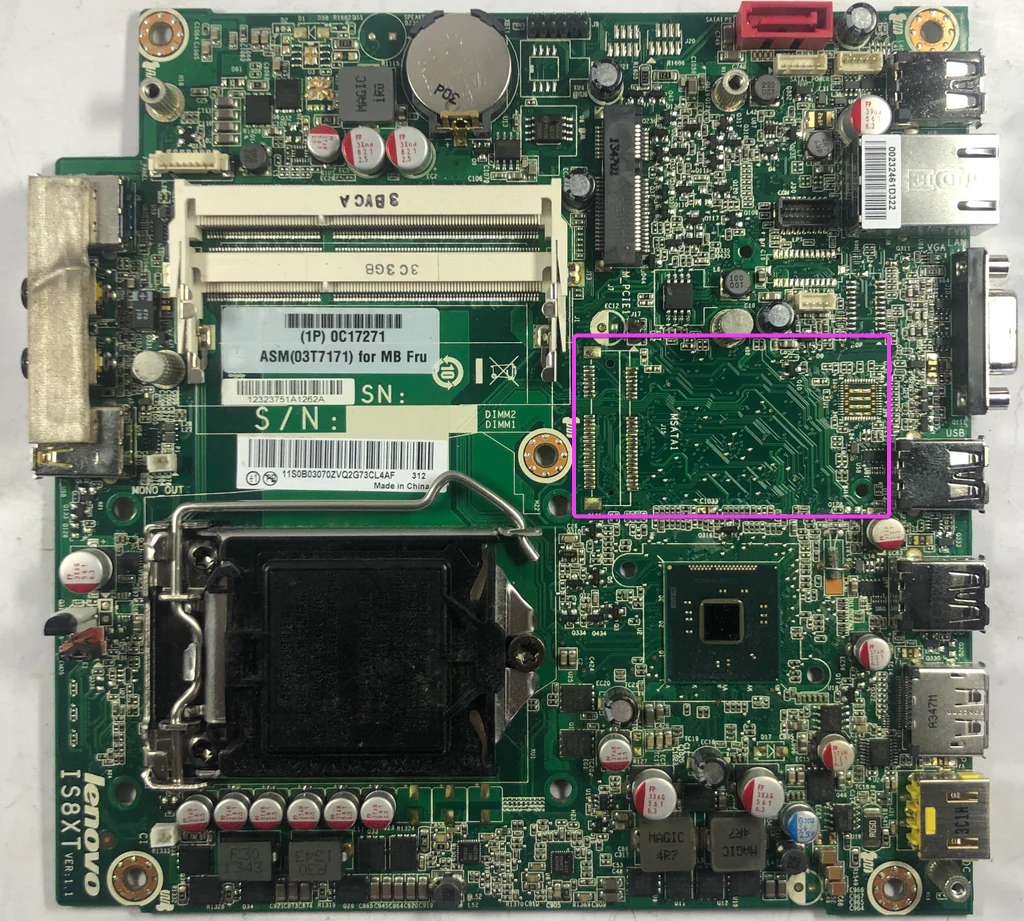
Which got me thinking. Could it be as simple as soldering a connector and plugging in an SSD? Tried soldering one and of course it didn't work 😑, that would be too easy.
After some research, I found that there are some M73 models that have a mSATA port, which makes this possible. So, I dug a little more.
I first found a video from someone who successfully modded the motherboard and IT WORKED, I got really excited and dug even more. I then found what, I believe, is the source of this mod: https://kknews.cc/digital/earlzm4.html. Turns out, all it needed was a few more passives and moving a resistor.
| Designation | Value | Package |
|---|---|---|
| C1, C2, C3 | 0.1uF | 0402 |
| C4 | 220uF | 6.3 mm |
| C5 | 330pF | 0402 |
| R1 | 8.2k | 0402 |
| R2,R3,R4,R5,R6,R7 | 0 Ohm | 0402 |
| Q1 | 2N7002/MOS-N | SOT-23 |
| L1 | 1uH | 0603 |
| MSATA1 | TE Connectivity 1775838-2 | Mini PCIe, 52 Contacts, 0.8 mm, Receptacle, Surface Mount, 2 Rows |
On the top side, there are only three components. The inductor is pretty easy to solder, the cap, however, was a nightmare, I could not solder to that ground plane. The mSATA connector looks painful but with some solder paste, hot air, and a bit of rework with a fine point tip, flux, and solder wick, it's actually pretty easy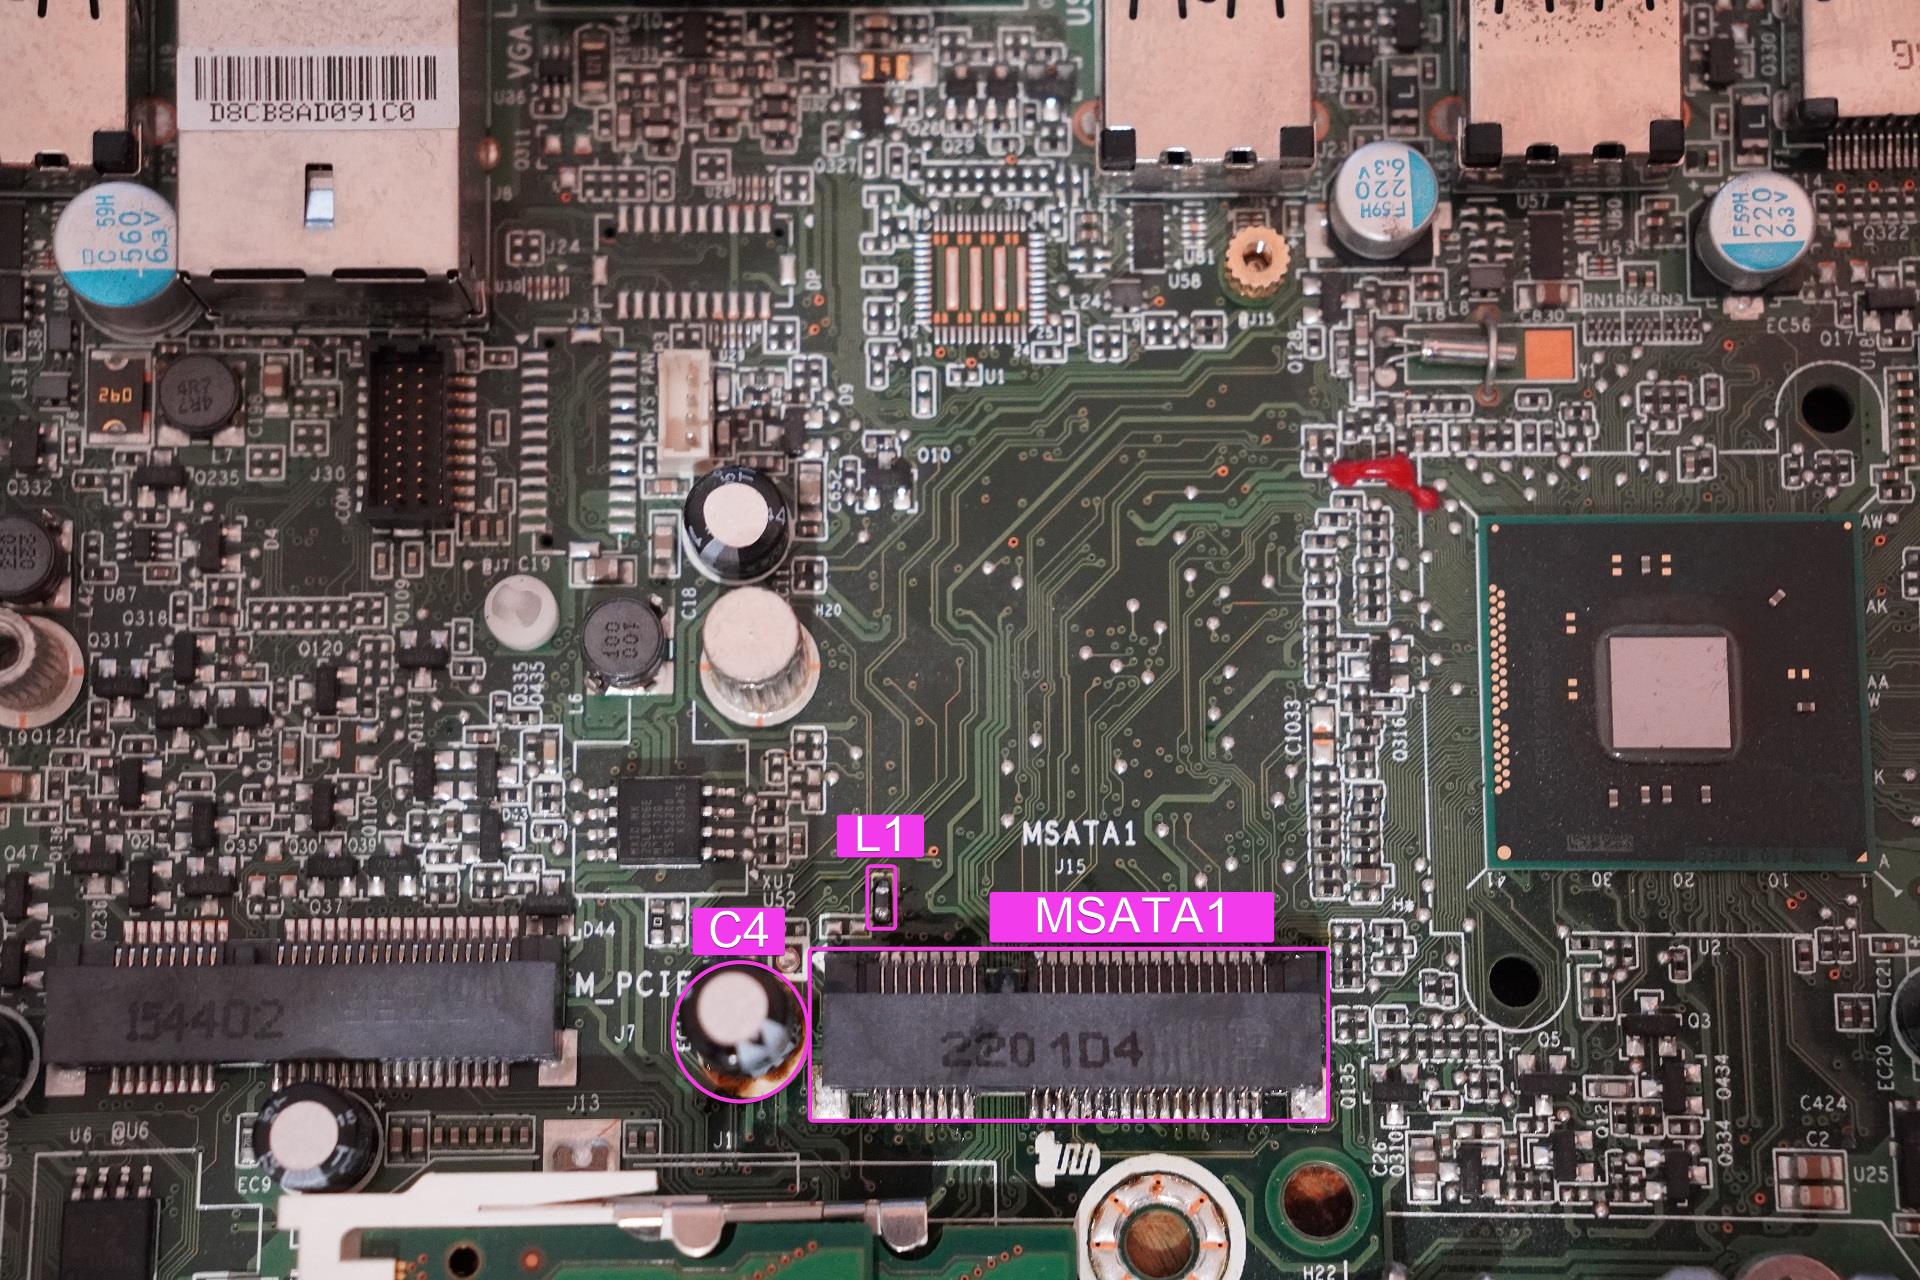
Bottom side is pretty easy, even for 0402, I replaced 0 Ohm resistor with wire bridges and swapped the resistor with some hot air. Not the prettiest job, but it should work.
After everything was soldered, I put a 128 GB SSD in the new slot, plugged a VGA cable and power and quickly hopped in the BIOS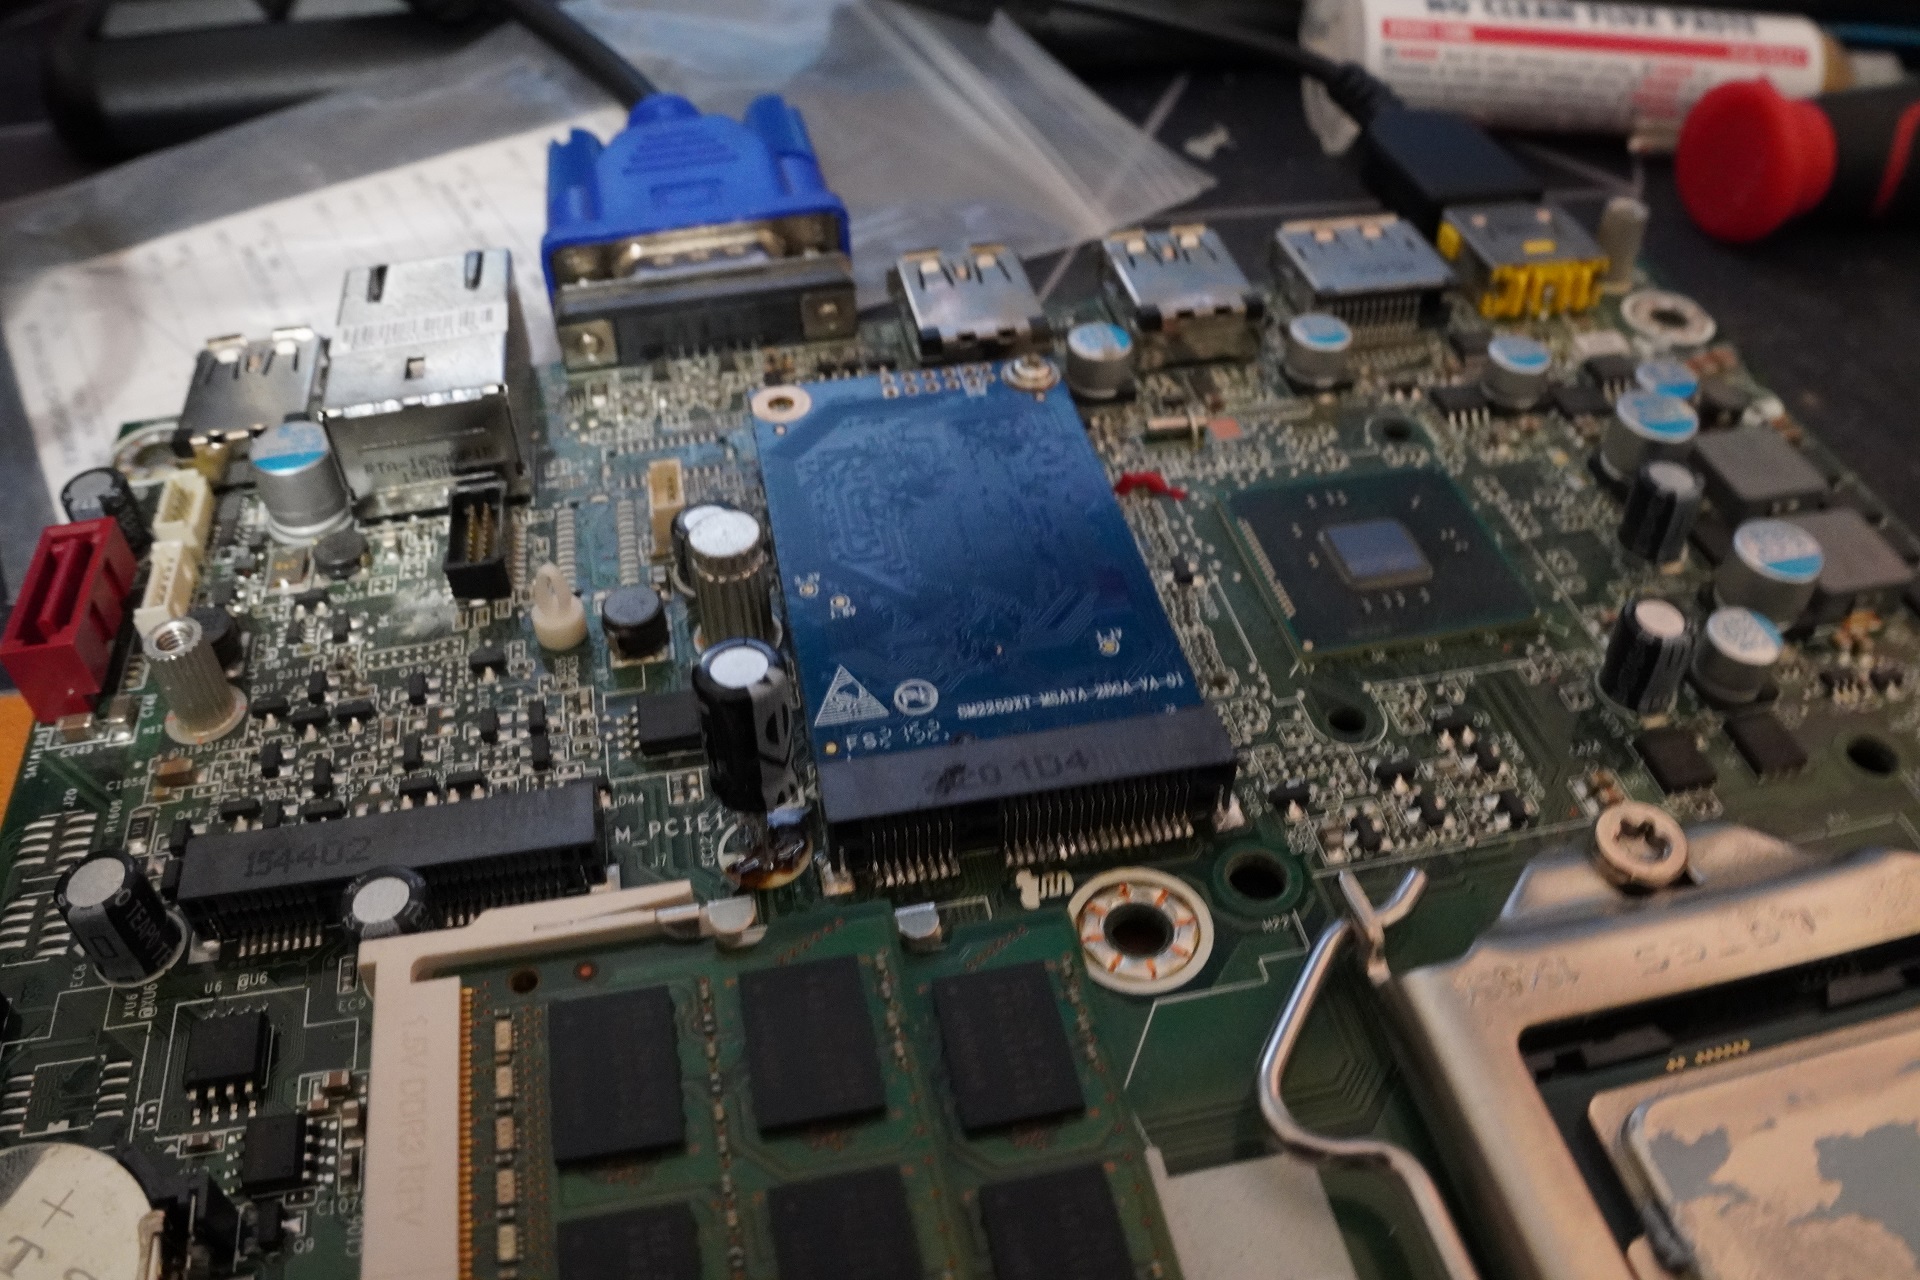
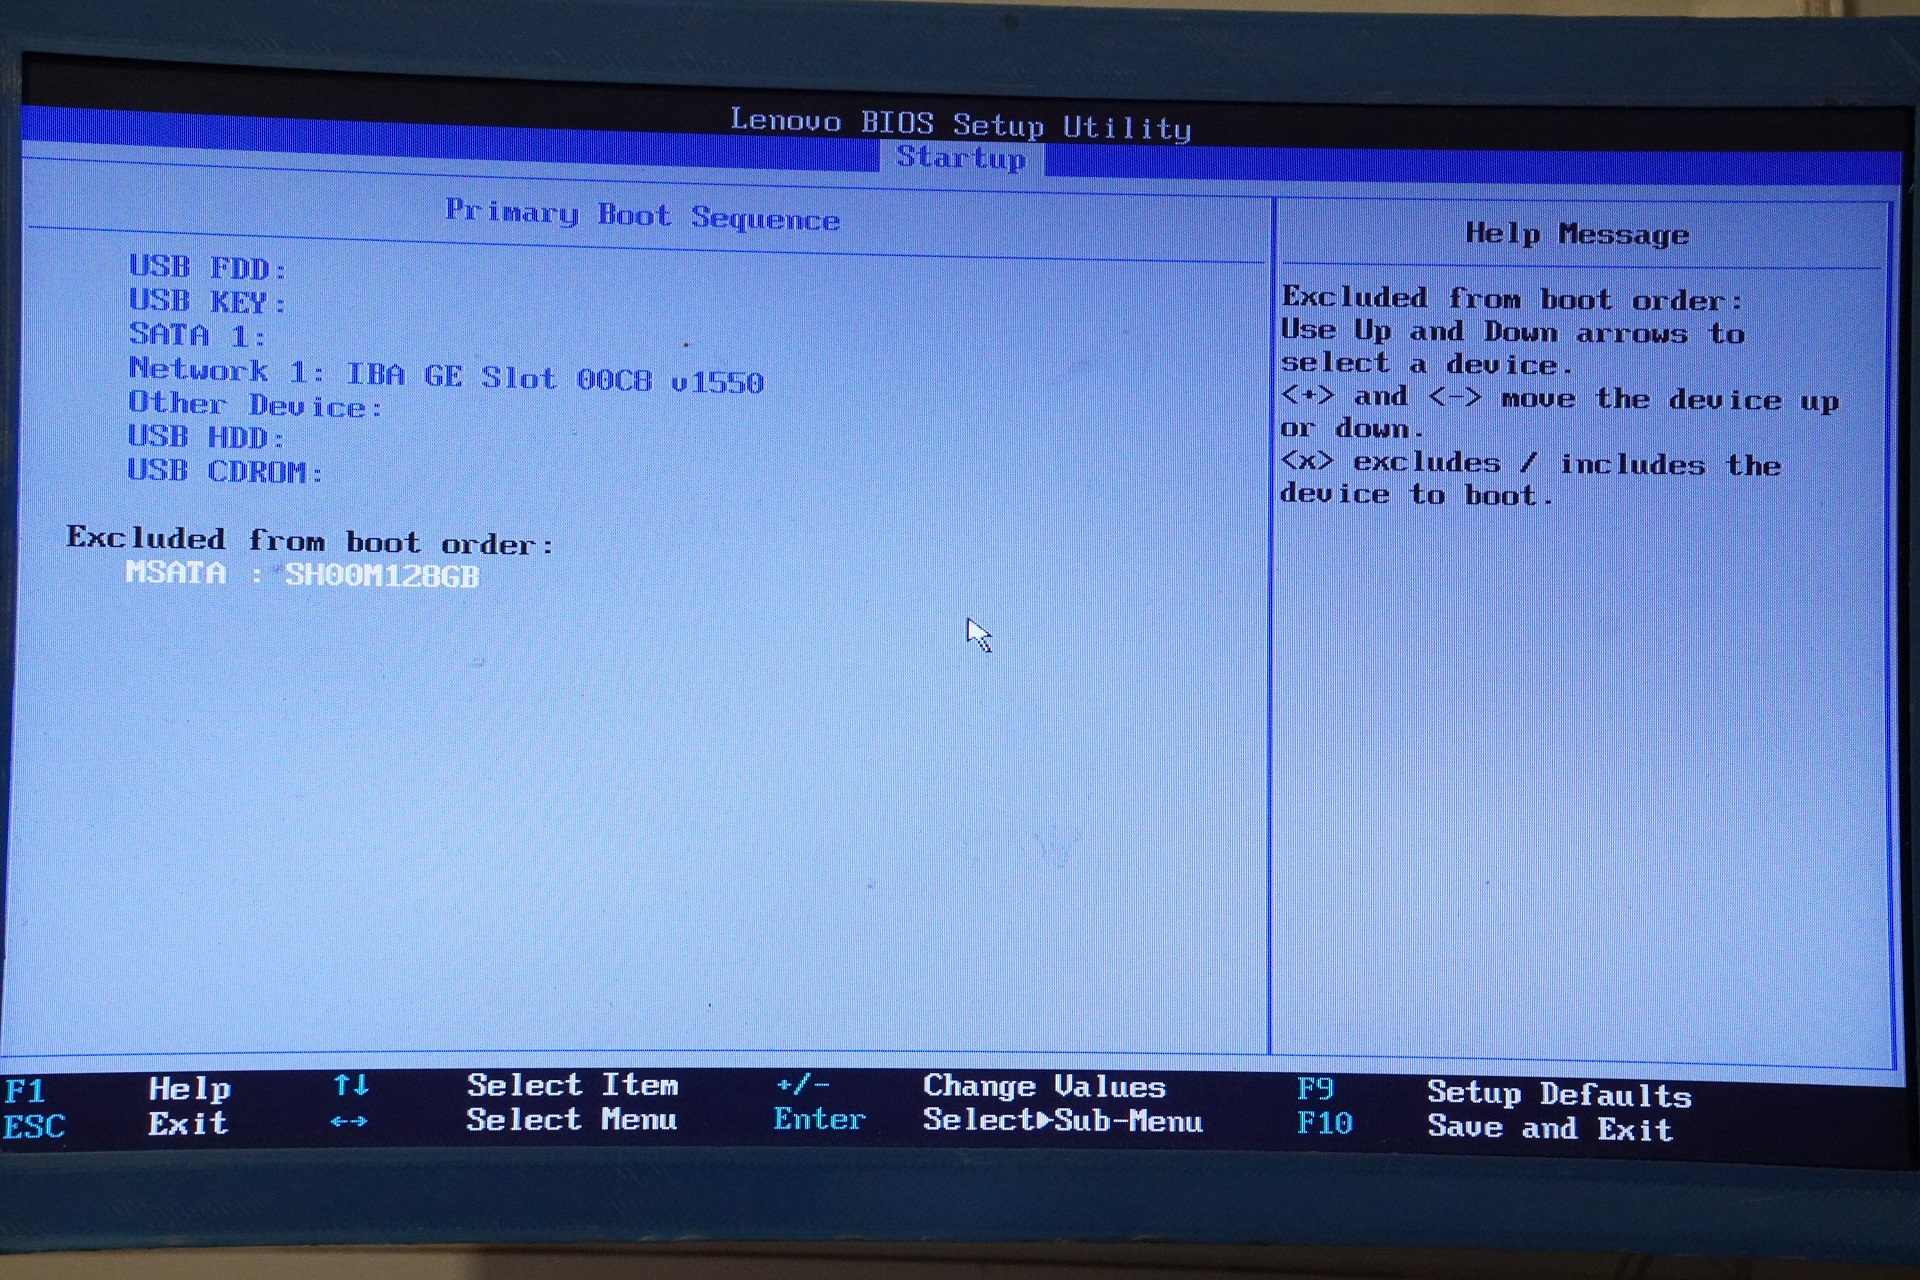
I made sure the SSD was detected AND IT WAS 🥳 and quickly powered it off again because I didn't have the cooler installed.
I then put everything back together and also took the opportunity to clean the cooler and changed the thermal paste.
Finished by installing proxmox and that was it:
Booted just fine, both disks are detected. To finish things off, I did some benchmarks:
root@pve4:~# hdparm -Tt /dev/sdb
/dev/sdb:
 Timing cached reads:   17150 MB in  1.99 seconds = 8597.18 MB/sec
 Timing buffered disk reads: 428 MB in  3.01 seconds = 142.02 MB/sec
root@pve4:~# dd if=/dev/urandom of=/tmp/output bs=16k count=10k; rm -f /tmp/output
10240+0 records in
10240+0 records out
167772160 bytes (168 MB, 160 MiB) copied, 1.17751 s, 142 MB/s
I'm very pleased with this mod 😀, seems a bit dodgy but if the soldering's good, there is no reason it will pose any issue. Moreover, 142.02 MB/s read and 142 MB/s write not bad at all, way better than what a USB 2 key will do 🤣.
Now I just have to do the same mod to the 3 other thinkcenter 😭.
Want to chat about this article? Just post a message down here. Chat is powered by giscus and all discussions can be found here: TheStaticTurtle/blog-comments